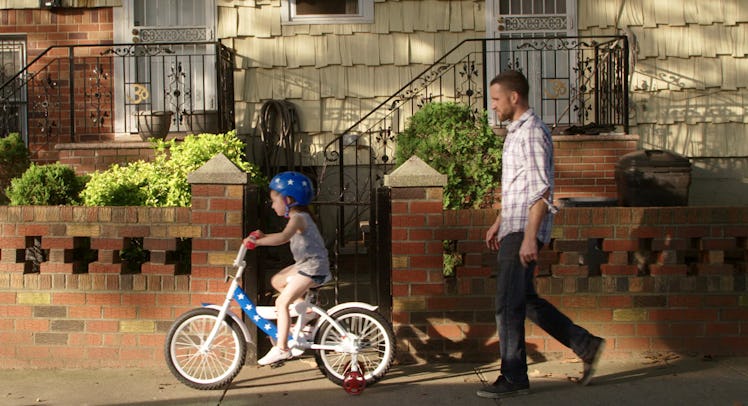
How to Make Your Kid’s Bike The Coolest on The Block
You don’t need mega bucks to build a daredevil cruiser — just a can of Krylon and some good old-fashioned elbow grease.

This story was produced in partnership with Krylon, the spray paint brand that can easily restore, refresh, recolor, and revive any project.
You don’t have to spend a lot to turn your child’s bike from ordinary to amazing. The right spray paint can transform a bike from basic to magic in no time. With the help of bright colors and a few simple stencils, you can take your child’s ride to whole new levels. Here’s how to do it.
Step 1: Prep The Bike
Tools: Allen wrenches of varying sizes; damp cloth; plastic bags; sandpaper; wire brush
Time needed: 30 minutes
- Using an Allen or adjustable wrench, loosen the bolts holding down the seat, the chain cover, wheel mounts, and the handlebars. Place bolts, screws, washers, and other small items in labeled plastic bags so you can remember what goes where when it’s time to reassemble.
- Separate components from the bike.
- Using 100-grit sandpaper (or an electric spot sander), remove any old, chipped or cracking paint areas on the bike.
- Use a wire brush to remove rust.
- Wipe down the frame with a damp cloth.
Step 2: Organize Your Products
Tools: Krylon® COLORmaxx Paint + Primer in multiple colors; Krylon Fusion All-In-One™; mask for face, hair, and eyes (optional); gloves (optional), a tarp or drop cloth.
Time needed: 10 minutes
- Dress the part: Masks and gloves are optional but if you have sensitive skin or eyes, consider inexpensive ones from the hardware store. Wear old clothes and if you have longer hair, tie it back.
- Find a spot in your garage or driveway that is relatively free of clutter, gives you enough room to maneuver, and is well-ventilated.
- Lay down a large tarp or drop cloth beneath the bike parts, enough to extend at least a foot from all sides of the frame.
- Lay out the Krylon® COLORmaxx Paint + Primer and Krylon Fusion All-In-One™ in a row. The last thing you need is to be caught searching for cans when the bike is disassembled and ready to go. Pick your colors, and make sure you have enough left in each can to finish the project.
Step 3: Lay the Base
Tools: White (or light) Krylon® COLORmaxx Paint + Primer
Time needed: 5 minutes
- Before spray painting, read the label on the back of the can for specific application and safety instructions.
- With the cap on, shake the can of Krylon® COLORmaxx Paint + Primer enthusiastically. Flip the can over and spin it in a circle to make sure the agitator balls circle the bottom rim and loosens paint pigment. Flip it back, shake some more, and pop the lid. (Note: It’s best to choose a light-colored Krylon® COLORmaxx Paint + Primer for your base. White is a safe bet as it goes with just about everything.)
- Find your angle. Position the can 8 to 10-inches from the bike surface.
- Spray in a steady, controlled motion. Try to avoid numerous starts and stops as this will make it harder to create an even base color.
Step 4: Add Decoration and Color
Tools: Wide tape; pencil; ruler; a box cutter or sharp knife; Krylon® COLORmaxx Paint + Primer; Krylon Fusion All-In-One™
Time needed: 20 minutes
- While the base color dries, create stencils for the patterns you will use. This bike has a stars and stripes theme (and a name plate). Other easy shapes include clouds, flowers, and hearts. Draw your pattern on a strip of wide tape, then use a knife to cut it out. Place the cut out flat against the bike frame and press to secure. (The bike should be dry to handle before applying the stencils and tape.)
- Spray the frame with your desired Krylon® COLORmaxx Paint + Primer shade using a sweeping motion for even application. (Ready for something a little more advanced? You don’t need to make the entire bike one hue— Krylon® COLORmaxx Paint + Primer comes in nearly 100 different colors; once disassembled, you can easily do different sections of the bike in different colors if you prefer.)
- While Krylon® COLORmaxx Paint + Primer works well on metal, for plastic surfaces like handlebar coverings, vinyl seats, and some helmets, Krylon Fusion All-In-One™ may adhere better.
- Be sure to remove the tape as soon as the paint is dry to the touch to avoid possible chipping or peeling that can occur when the paint is completely dry.
Step 5: Protect Your Handiwork
Tools: Damp cloth; Krylon® COLORmaxx Paint + Primer; Fusion All-In-One™; Allen wrenches; screwdriver
Time needed: 35 minutes
- Although Krylon does make rust protectors, both its COLORmaxx Paint + Primer and Fusion All-In-One™ include rust protection in their formulas, meaning the paint you apply will also serve to protect against rust in the years to come.
- What needs protecting? Your kid’s head. Start by wiping down the helmet with a damp cloth, then spray-painting it with white Krylon® COLORmaxx Paint + Primer. Using the same motifs as the bike, add cutouts to your child’s helmet, then spray the entire thing again with the desired color. Slowly peal off the cutouts.
- Using an Allen or adjustable wrench and screwdriver and reassemble the bike.
- That’s it! Add streamers, bells, and baskets as you wish. Your kid — and the coolest bike in town — are now ready for the road.
This article was originally published on