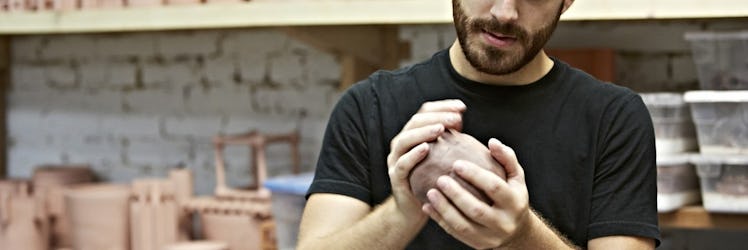
Get Your Kid To Play With Play-Doh Like A World-Class Ceramicist
Break the mold.

For more advice on fun stuff to do with your kids, from ridiculously overqualified experts, check out the rest of our 940 Weekends.
It’s the chosen medium of every artist under 3, and the scourge of many a shag carpet. Los Angeles ceramicist Ben Medansky remembers the first thing that he learned to make using Play-Doh was a snake, which he turned into a coil, and then made that into a snail. “I did it over and over again,” he says. “I actually never stopped doing it.”
Now Medansky is known for his creative hand-thrown mugs that trendy Angelinos drink coffee out of, but in his studio, he still uses most of the techniques that he learned as a kid. That pancake your child is smooshing together? In ceramic-speak, that’s called a slab. That neon orange spaghetti they’re making? Medansky uses the same thing (but on a bigger scale).
Below, he talks about simple techniques to use with Play-Doh, stealing his best tools from the dentist’s office, and how to avoid soul-crushing disappointments at Color Me Mine.
Make The Most Out Of Play-Doh
“I use Play-Doh as a reference point,” says Medansky — who has a lot in common with your little sculptor, except people will actually pay for his stuff. Here’s how to get them started on making more than a mess:
- Create a slab. Once you have a sheet of dough you can start bending it, shaping it, or, as you would do with cookies, make cutouts. It’s how the big boys do it.
- Use different colors to form different layers. All those shades of Play-Doh will eventually become a weird mauve in the hands of a toddler, but you can also do cool things like make marbled textures or a detailed rendering of the Earth’s crust.
- Your Play-Doh is going to dry out, and that’s cool. “It’s planned obsolescence,” says Medansky, who recommends you keep your kid’s hardened creations and move on.
- Because it’s going to dry out, you’re going to need a lot of it, and that name brand shit ain’t cheap. Here’s a quick recipe to keep your artist rolling in dough (see how that joke plays with your 5-year-old).
BEN MEDANSKY
You Made It Out Of Clay
When play (doh) time is over, you can shift over to something a bit more firm for detailing, likeSculpey or bake clay, which has a few benefits over the kid stuff.
- The big kid material is easier to use once they master that dexterity thing and want to create thinner elements, like a diabolical moustache for Mr. Potato Head. Also, it stays moist a lot longer, so they can leave and come back to it. After nap.
- The trick to getting clean lines with traditional clay is to avoid shaping it when it’s still wet. Medansky lets his dry out, so it cuts cleanly.
- Create your own armature out of aluminum foil. Grab a roll of Reynold’s Wrap and tear off a few pieces. Mash those together to form a little stick figure tin man that you can manipulate into different poses. “It was cheap, and I wanted to get the most out of the clay, so I used it as a space filler. The clay would act more like a skin than the structure.”
BEN MEDANSKY
Steal From The Orthodontist
“When I was a kid I was at the dentist or the orthodontist every 2 weeks, so I’d ask them for old tools,” says Medansky. “They were sterile of course. And with them I was able to do details like lips, eyes and ears.” Don’t have that kind of relationship with your kid’s dentist? They’re actually pretty cheap (and very sharp). Other, less-stabby things you can use:
- Paper clips. “They work great, but they’re harder to hold on to.”
- Shoes. Chucks are fun, but Yeezy’s make the best patterns on slabs.
- Push down some leaves, to make relief impressions
- Pebbles are good for making circular indentations
- Pencil Erasers, to make bigger circles
FLICKR / ANTONIO PARRA
How To Kill It At Those Pottery Painting Parties
“When I go to Color Me Mine, I always like the idea of taking light colors, like yellows and pinks, and painting patterns on top of that using blue and purple,” says Medansky. “Then when that dried I’d apply masking tape [in a pattern], paint the whole thing black, and then peel it off to reveal what I kept.” Once your kid masters this technique, you’ll never need to step inside another Crate & Barrel again.
- Three layers and when they say it, they mean it. Do the glaze too thin and you’ll see the clay through it — 3 coats will get a vibrant color.
- Mixing colors with glazes is like paint, but reds and blues don’t always make purple. Sometimes it turns muddy and brown. They’re chemicals and minerals, not pigments.
- Don’t forget about the top and bottom. One of the things that Medansky likes to do is purposely leave the bottom unglazed, creating a cool, unfinished effect.
- Don’t just use the crappy brushes they give you. Sponges and rubber stamps are also great. You can cut up an ordinary pink eraser to make your own stamp.
- It won’t be what you expect. “You can try to control what [the pot] is going to look like, but once it goes into the kiln and fires to 1000 degrees, you never know how it’s going to turn out — and that should be exciting.”
This article was originally published on