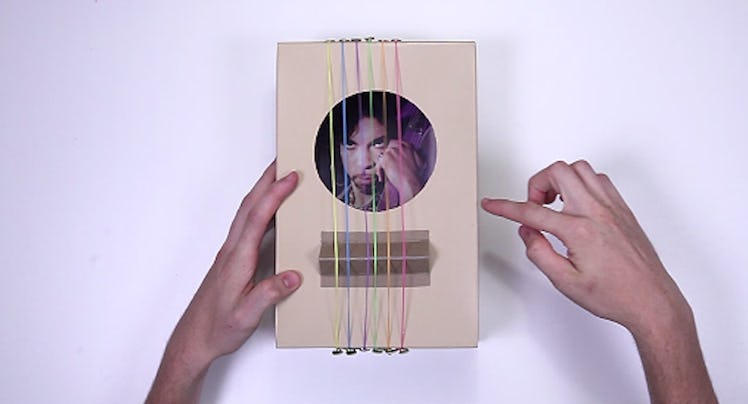
This DIY Shoebox Guitar Will Take You And Your Kid About 10 Minutes To Build
Rubber bands — way easier on the fingers.

You dream of your kid following in the footsteps of legendary axemen like Jimi Hendrix, Slash, or Janice, but guitars aren’t cheap. Meanwhile, you have a huge stack of recycling just sitting there. What do these 2 things have to do with each other? Everything!
With just a shoebox and a few things you can pick up in that grocery store aisle with all the weird non-food things, you and your kid can build a (sort of) guitar that’s perfect for them to shred on. Will it give you a sense of their innate musical ability? Of course not! But it will give you a sense of whether or not there’s a huge rock star somewhere in that tiny body. That’s valuable information to have before you drop $700 on a new Gibson that spends their adolescence in the back of the closet, gently weeping.
Materials
- Sturdy shoebox with lid
- 6 colored rubber bands
- 12 split pins
- Image of Prince (The more majestic, the better)
- Extra cardboard
Tools
- Glue gun
- X-acto knife
- Ruler
Directions
- Glue your picture of Prince on the inside of the shoebox (this is the most important step).
- Cut a 3-inch hole in the middle of the shoebox lid using the X-acto knife.
- Fold extra cardboard into an arrow with small edges on each side. This will serve as a ‘bridge’ for the guitar’s strings, which will help improve the sound quality of your kid’s strumming.
- Glue the ‘bridge’ below the shoebox’s hole.
- Press 6 split pins into the side of the shoebox directly below the ‘bridge.’ Attach end of one cut rubber band to each pin.
- Attach the other end of the rubber bands with 6 remaining split pins on the opposite side of the shoebox above the hole.
- Make doves cry.
This article was originally published on